


Finally found that perfect canvas that you just can’t wait to get started on? Amazing! The next step is something that we call kitting in the needlepoint world. Kitting refers to the process of selecting the threads you will use to complete a project. There are lots of thread types to choose from so kitting might seem overwhelming at first, but below is a helpful guide to ease your thread selection journey!
1. Selecting the Fiber Type
First, you’ll decide what kind of fiber you would like to use. This choice can usually be narrowed down using three categories: the mesh size of the canvas, the final item that you’d like to turn your needlepoint project into, and personal style and preference.
The Mesh Size of the Canvas
There are two standard mesh sizes of canvas in needlepoint - 13 mesh and 18 mesh. These numbers refer to the number of stitches across one inch of the canvas; 13 mesh has 13 stitches per inch and 18 mesh has 18 stitches per inch. This means that 13 mesh requires thicker fiber to cover the wider-set mesh. Fibers like Silk & Ivory and DMC 3 are perfect for those 13 mesh projects. Conversely, 18 mesh canvas features a denser weave that requires a thinner thread, so that it can easily pass through the holes of the canvas while still delivering full coverage. Fibers like DMC 5, Pepper Pot Silk, Essentials, and Vineyard Silk are perfect choices in this case. There are some fiber types, like Vineyard Merino Wool, that can work on both 13 mesh and 18 mesh. They provide slightly less full coverage on 13 mesh, but very full coverage on 18 mesh.
What your stitched needlepoint canvas will become
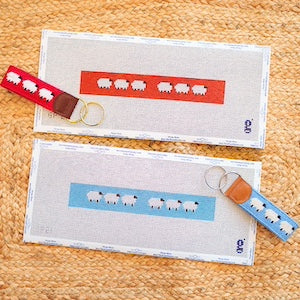
Now that we have narrowed down our fiber options using the mesh size of our canvas, it is time to start thinking about the finished product. Believe it or not, your vision for your finished project matters when choosing fibers. For items that will see more wear and tear, like belts, keyfobs, or open-faced coasters, we would want to select a stronger, more durable fiber like wool or cotton, to increase the longevity of the finished item. For more decorative projects, like an ornament, standup, or something that will ultimately be framed, we have a bit more freedom. These instances are the perfect opportunity to use things like delicate silks or fun specialty fibers!
Personal Style/Preference
Once we have considered both the mesh size of the canvas as well as your project’s final form, the decision is often left up to personal preference. Some fibers are bouncy while others are tight and strong. Some fibers provide texture while others are more smooth. Every stitcher tends to find their favorites, as well as fibers they do not particularly care for. There is no right or wrong inclination towards certain fibers or others, and you are free to stitch with whatever makes you happy.
2. Color Selection
Yay! You’ve selected your fiber type. Now comes the fun part, choosing the colors for your project. One exciting thing about needlepoint is that you do not have to stitch your projects exactly as they are painted on the canvas. If you love the look of the design, you can choose colors that very closely match, or you often have the freedom to tweak shades and colors if you please. This creative choice is something the needlepoint community refers to as color swapping. Take your time, pull plenty of color options, and test them against the canvas and each other to see what looks best until you have a selection that you are pleased with.
3. Number of Skeins
The number of skeins you need of one color depends on the size of the area to be stitched and the fiber type you are stitching it with. Below are some helpful approximations to better visualize how far one skein of certain threads can go. These are approximations based on stitching with maximum efficiency in continuous background areas. For shading or intricate shapes, you’ll likely need more thread than these estimates indicate.
- DMC 5: About 27 yards per skein, stitched on 18 mesh - about the size of your fist.
- Pepper Pot: About 30 yards per skein, stitched on 18 mesh - slightly larger than the size of your fist.
- DMC 3: About 16 yards per skein, stitched on 13 mesh - slightly smaller than the size of your palm.
- Silk & Ivory: About 28 yards per skein, stitched on 13 mesh - slightly smaller than the size of your hand laid flat with fingers together, OR about the size of two fists.
Different threads are dyed using different processes. DMC cotton is dyed in a factory process that provides greater color consistency from skein to skein. Other threads, like Silk & Ivory and Pepper Pot Silk, are dyed in batch processes, meaning that the color doesn’t always come out exactly the same every time, because the dye is mixed anew for each batch. For these “dye lotted” threads, you’ll want to ensure that you are getting enough skeins from the same batch, or “dye lot,” to complete your project. These fibers will usually feature the dye lot number on the tag of each skein so you can ensure consistency in your colors throughout the stitching process. For any thread that you’re stitching with, whether it’s dye lotted or not, it’s very helpful to keep the tag that has the thread type and color number on it, in case you run out and need more! For DMC cotton, the tall barcoded tag is the one to hold onto, whereas most other threads are packaged with one single tag that contains the color number and dye lot information, if applicable.
Once you’ve selected your fibers, finalized your colors, and determined the number of skeins needed, you’ve officially kitted your canvas. Congratulations! Taking the time to thoughtfully kit your project sets you up for a smoother, more enjoyable stitching experience from the very first stitch to the last. Happy stitching!